
Select, Hide and Move Models
Select models and their parts, hide or lock them, and set each model's position, rotation and scale.
Overview
A project holds one or more models, and a model can be made of parts. The Scene tab in the left panel lists your models and the parts inside them. The Model tab in the right panel and the Transform toolbar on the right edge let you move, rotate and scale what you select.
The Transform toolbar and the Model tab are there only when you are signed in. Gaussian splat models appear as a single row with no parts, no wireframe and no moving or scaling. See Gaussian splats.
The scene tab
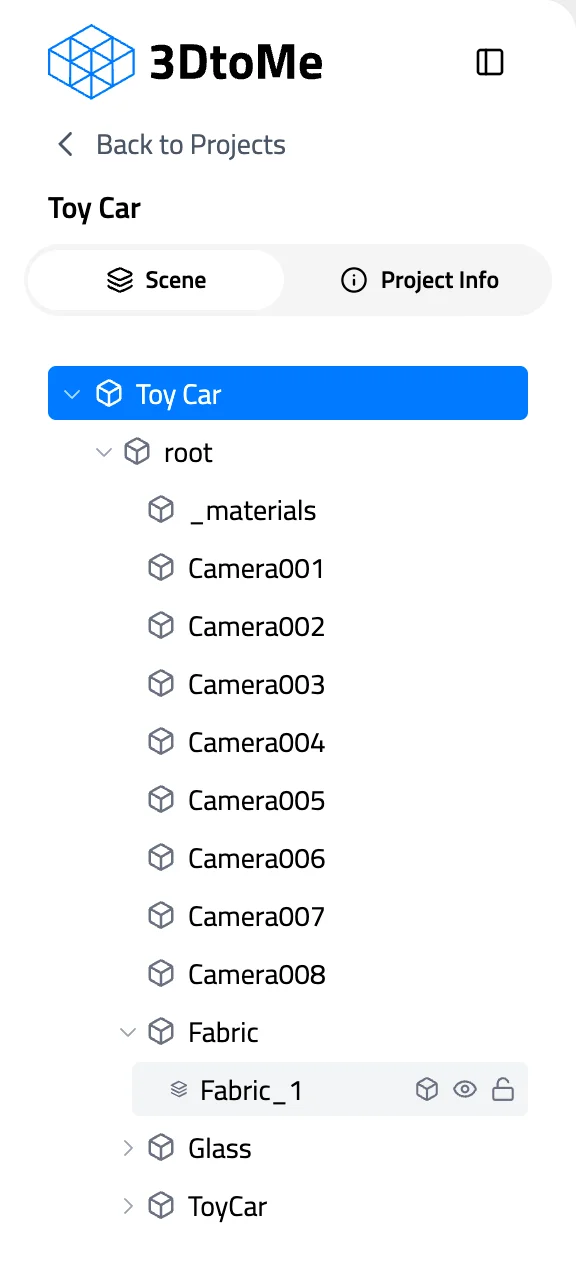
Open the left panel and click Scene. Each model has a row with its name. If the model has a description, it appears under the name. Click the arrow at the start of a model's row to list its parts. Parts that contain other parts have their own arrow.
Hover a row to show its controls. A model row has one control and a part row has up to three:
| Control | On | What it does |
|---|---|---|
| Wireframe / solid | Models and parts | Draws the surface as edges, or back as a solid |
| Show / hide | Parts | Hides the part in the 3D view, or shows it again |
| Lock / unlock | Parts | Stops the part from being moved. The lock icon stays visible while the part is locked. |
Hiding, locking and wireframe are only for you. They reset when you reload the page.
On a project you own, right-click a model row for two more actions:
- Rename changes the model name.
- Delete removes the model from the project after you confirm. Its files stay in the Assets panel, so you can drag them back onto the Scene tab later.
To add models, drop 3D files on the Scene tab. See Create a project and upload models.
Select models and parts
| Where | Action | Result |
|---|---|---|
| Scene tab | Click a row | Selects that model or part |
| Scene tab | Double-click a model row | Selects the model and flies the camera to it |
| 3D view | Click a model | Selects the whole model |
| 3D view | Double-click a model | Selects the part under the pointer and expands the Scene tab down to it |
| 3D view | Click empty space | Clears the selection |
The selected row turns blue. When Selection outline is on in Settings, the viewer also outlines the selection in the 3D view. See View settings.
Transform toolbar
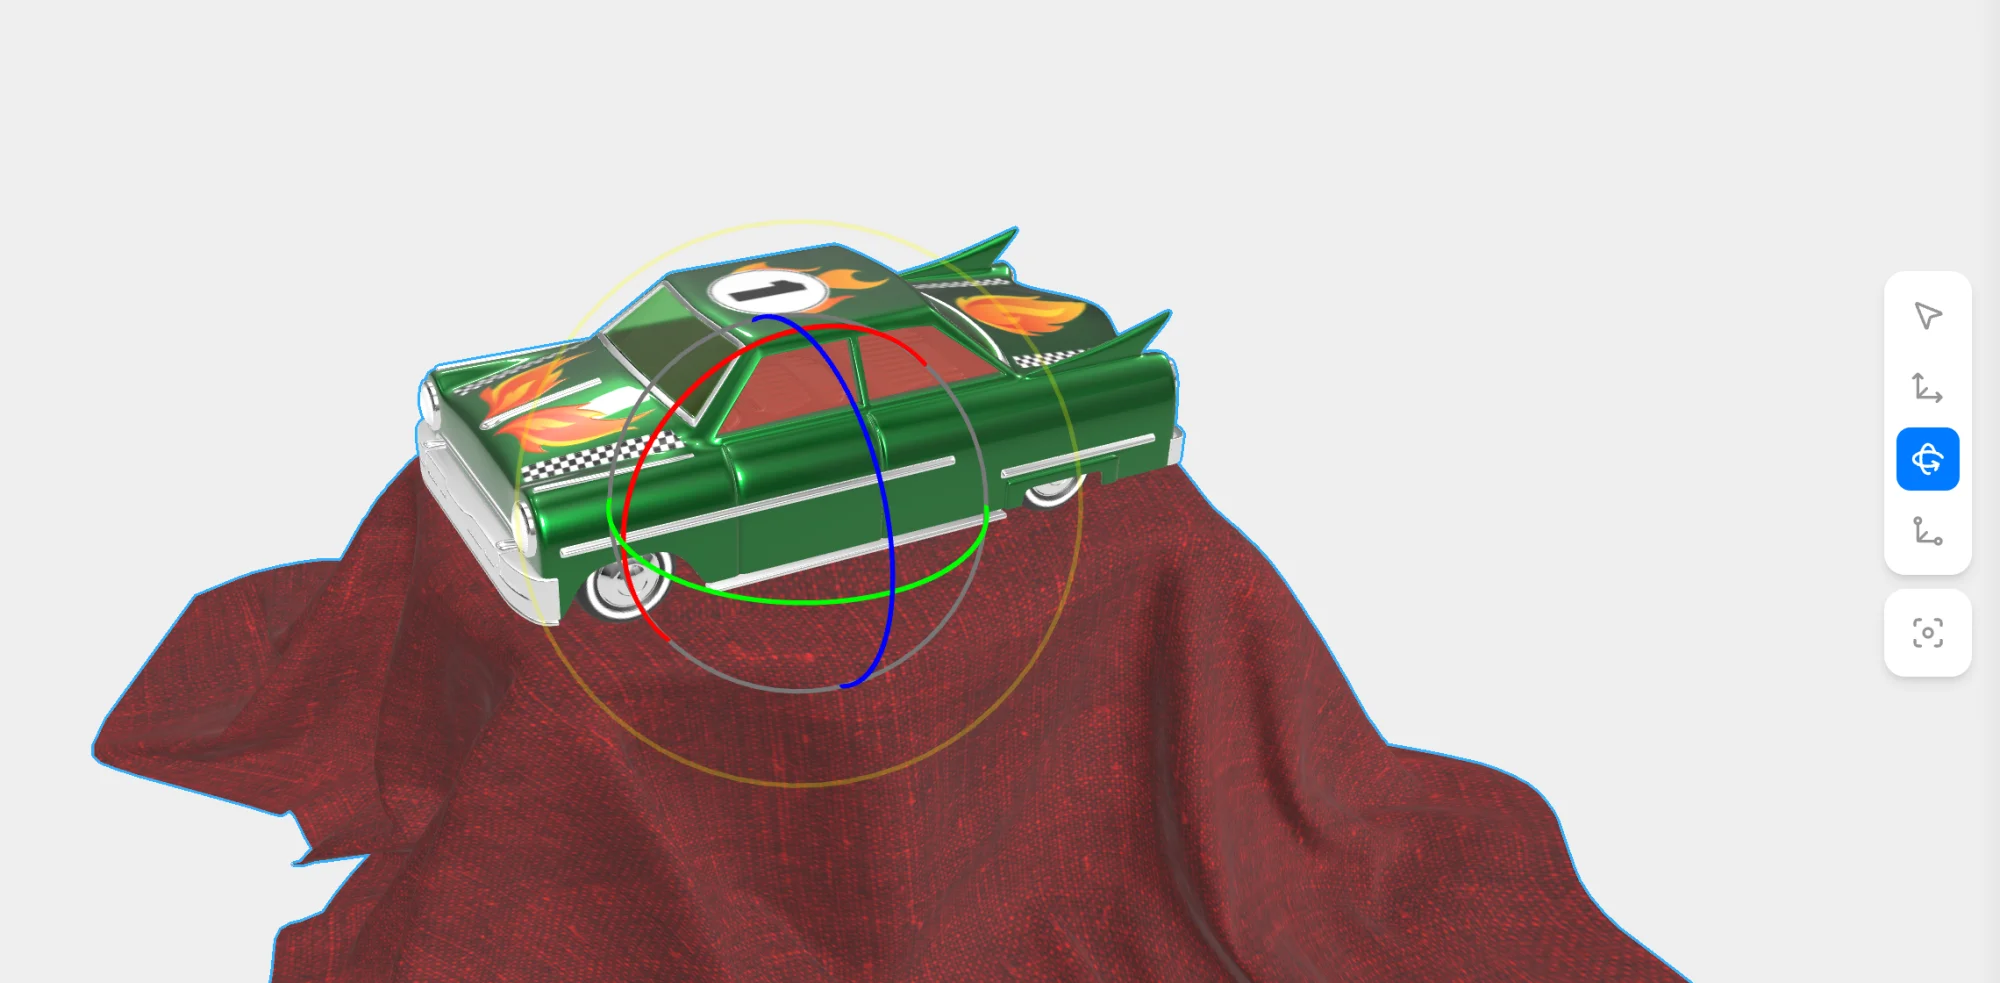
The Transform toolbar sits on the right edge of the viewer, next to the right panel. It has four tools:
| Tool | What it does |
|---|---|
| Select | Selects without showing any handles. This is the default. |
| Position | Shows arrows to drag the selection in each direction |
| Rotation | Shows rings to turn the selection |
| Scale | Shows handles to resize the selection |
Pick a tool, select a model or part, and drag the handles. The handles don't appear on a locked part. The uniform scale lock is on by default. With it on, dragging one scale handle resizes the model evenly in every direction.
Changes you make with the handles stay unsaved until you click Save in the Model tab. The Reset view button under the toolbar moves the camera, not the models. See Camera navigation.
In a collaborative call, only the speaker can move models. See Collaborative call.
Exact values
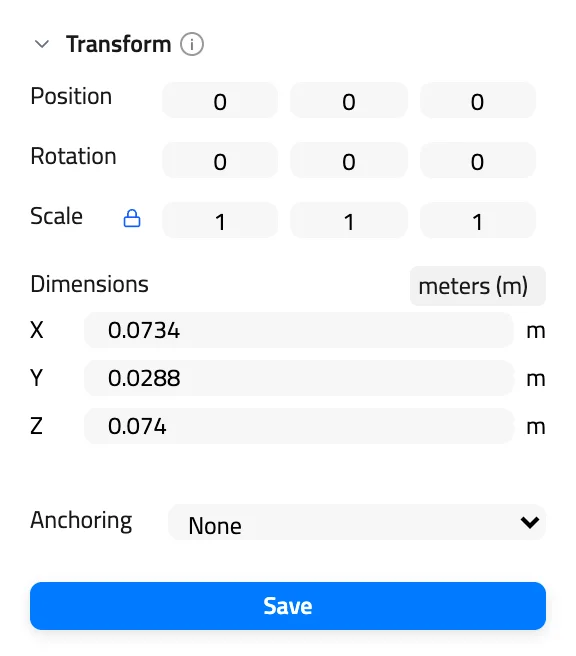
Select a model, open the right panel and click the Model tab. The Transform group has:
- Position, Rotation and Scale, each with three boxes for the X, Y and Z axes. Rotation is in degrees. Type a value and the model moves as you type.
- A padlock next to Scale for the uniform scale lock. When it is on, changing one axis changes all three.
- Dimensions, the model's real size on each axis. You can't edit them, but you can switch the unit between millimeters, centimeters, meters and kilometers.
Click Save to store the position, rotation and scale. The button shows Saved for a moment when the save works, or Save failed, retry when it fails.
You can move a part to look at it, but the viewer saves the position of whole models only. The part goes back to its place when you reload.
Anchoring in the same group and the Gestures group below it set how the model behaves in AR. See View in AR.
Next Steps
- Add more models in Create a project and upload models.
- Set how the model behaves in AR in View in AR.
- See every shortcut in the keyboard shortcuts reference.
Still have questions?
If you still have questions, please reach out to our support team for assistance.
Contact Support