
Material Variants
Give each part of a model alternative materials, combine them into configurations, and let viewers switch between them.
Overview
A material variant is an alternative material for one part of a model, such as a leather seat that also comes in fabric. A configuration combines variants of several parts into one look for the whole model. Viewers of your project can switch between configurations.
Creating and editing variants needs the Variants add-on, which is available on the Corporate and Enterprise plans. To add it to your account, contact the 3DtoMe team. Without it, the Variants tab does not appear.
Variants work on mesh models only, not on Gaussian splats.
What viewers see
Signed-in viewers who don't manage the project find a Configurations section in the Model tab of the right panel. It shows the visible configurations of the selected model as tiles. A click applies a configuration. A second click on the same tile restores the original materials.
The section appears only while the project owner has the Variants add-on and the model has at least one visible configuration. Viewers don't see single-part variants, only configurations.
Add a material variant
You work with variants on the Variants tab of the Assets panel at the bottom of the viewer. You see the panel when you are signed in and the project is not public. The viewer hides the panel on small screens, so use a computer to work with variants.
- Open your project and click Variants.
- In the Scene tab of the left panel, select the part of the model you want to change. Until you select something, the tab says "Select a node to see its material overrides". A node is a part of the model.
- The tab shows the variants of that part as tiles. Click Add material.
- In the Choose a material window, click Custom to set up the material yourself, or pick a ready-made material.
The viewer creates the variant, applies it to the model and opens the material editor in the right panel.
The Choose a material window has 17 ready-made materials, called presets, in five groups: Fabric, Metal, Stone Surface, Wood and Other. The web viewer shows a close version of each one. They look exact in the 3DtoMe app for Mac. You can't change the settings of a ready-made material. To change the look, add another variant.
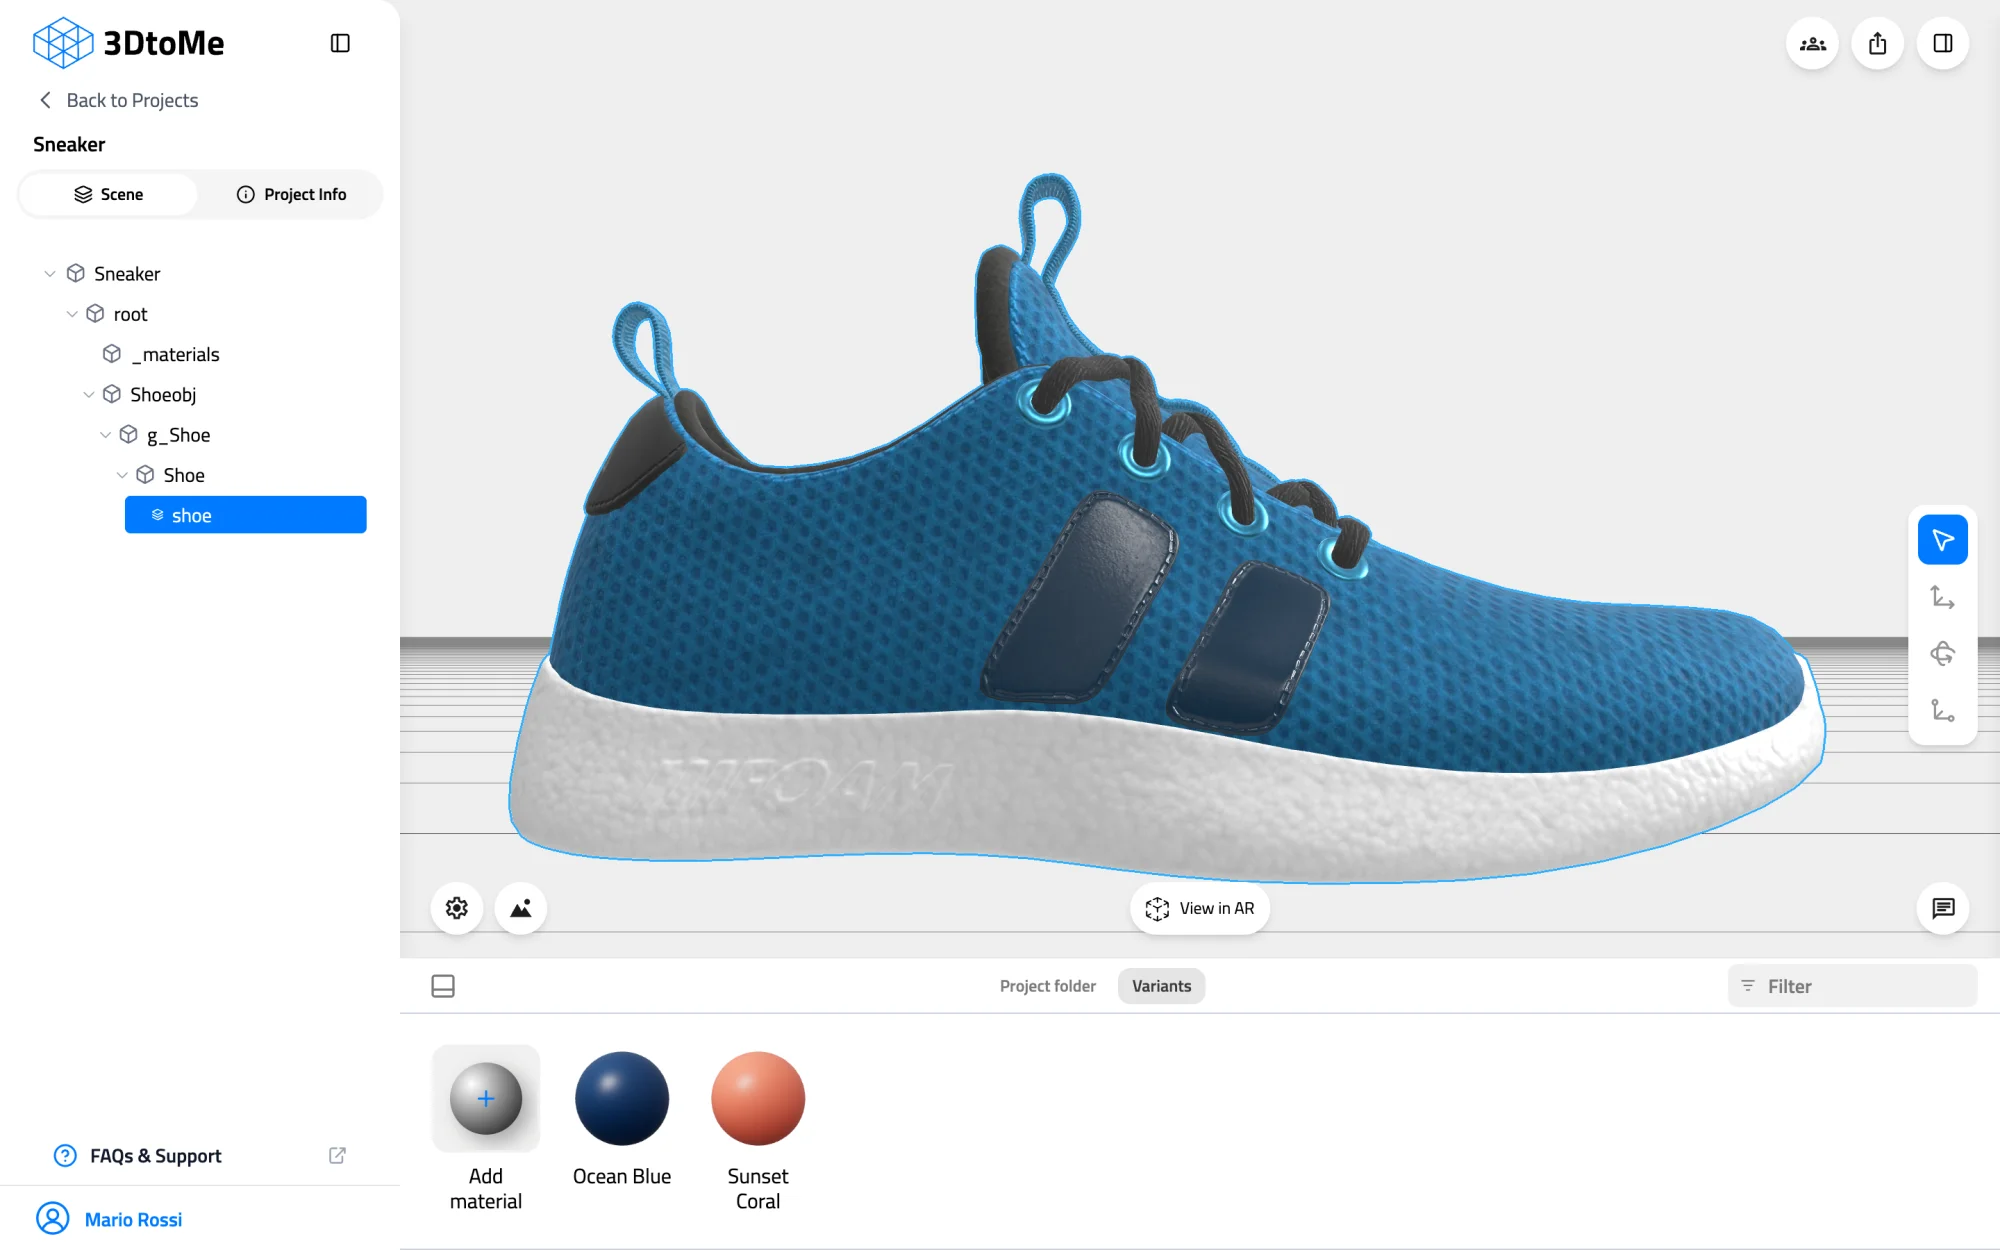
Model: MaterialsVariantsShoe by Shopify, CC BY 4.0
Edit a material
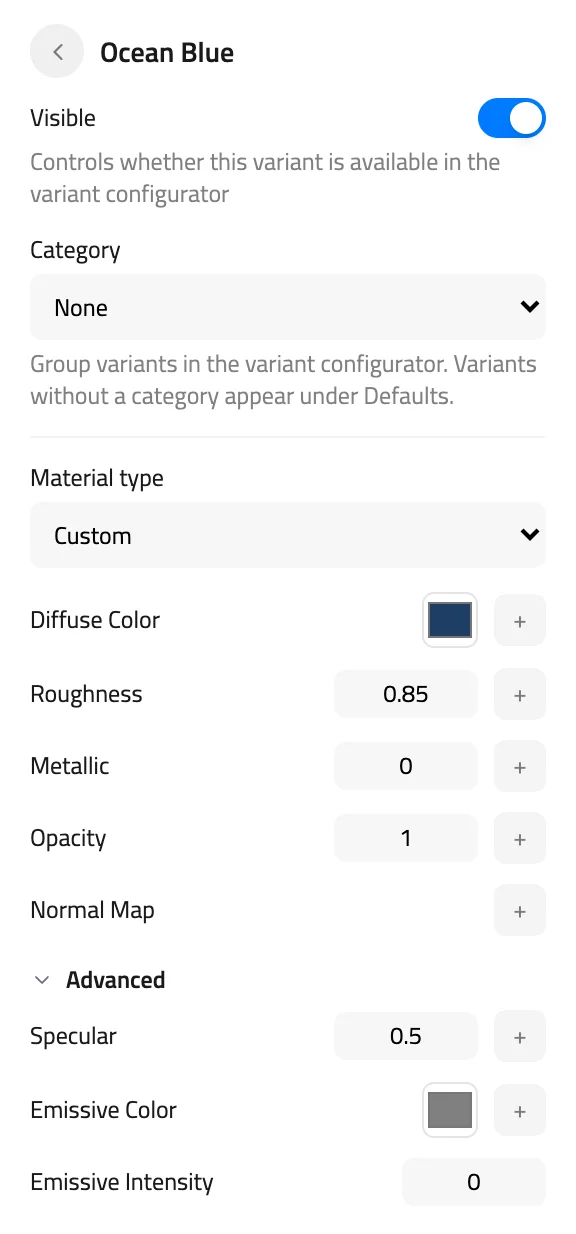
Pick how much of the material you want to control in Material type:
| Material type | What you can set |
|---|---|
| Color | A single Diffuse Color |
| Textures | A Diffuse Color texture image |
| Custom | Every setting, described below |
With Custom you can set color, roughness, metallic, opacity and a normal map. Specular and emissive settings are under Advanced. Every setting except Emissive Intensity can also use a texture image.
To add a texture, click the texture button next to a setting. Pick an image already in the project, click Upload an image, or drop an image file on the window.
The model updates as you edit, but the viewer stores nothing until you click Save. Revert discards your edits.
Combine variants into a configuration
A configuration reuses materials that already exist. Create the variants for each part first, then combine them:
- In the Scene tab, click the model's own row to select the whole model.
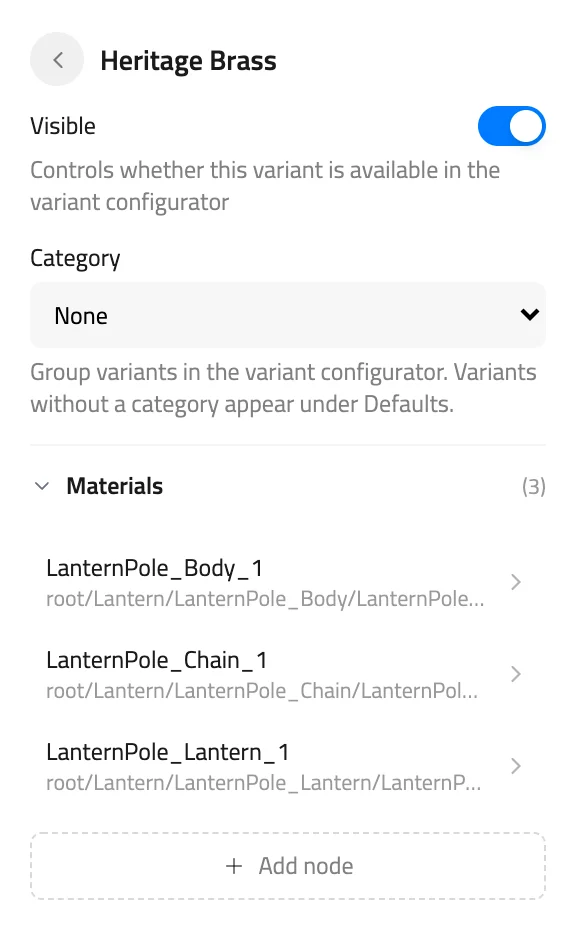
- On the Variants tab, click Add configuration. The editor opens with an empty Materials list.
- Click Add node, then select a part in the Scene tab. You can pick only parts that already have materials.
- Click Confirm. In the window that opens, choose which of that part's materials the configuration uses.
- Repeat for every part, then click Save.
Click a row in the Materials list to open that part's material. The back arrow returns to the list. To drop a part from the configuration, right-click its row and choose Remove material.
Visible and category
The top of the editor has two settings that control how viewers get the variant:
- Visible controls whether the variant is available in the variant configurator. Viewers don't get hidden variants. You still see them in the Variants tab.
- Category groups variants in the variant configurator. Pick an existing category, None, or New category… to name a new one. Variants without a category appear under Defaults.
Apply, rename and delete
- Click a tile to apply that variant to the model and open it in the editor. A variant can change more than the selected part, and the viewer applies all of it.
- Click the empty area of the Variants tab to remove every variant and show the original materials again.
- Right-click a tile and choose Rename or Delete. Deleting asks for confirmation and can't be undone.
- Click the back arrow in the editor, or select another part, to close the editor and take the variant off the model.
Good to know
- Some models need an update before you can use variants. If the Update this model window opens, click Update. The model reloads and the Variants tab opens. If the window says the model can't be updated, upload the model again.
- If you delete an image from the project's assets while a variant uses it, the viewer warns you first. The settings that used the image go back to their default value.
Next Steps
- Select parts of a model in the hierarchy.
- Attach product sheets and videos with the model gallery.
- Compare plans on the Plans page.
Still have questions?
If you still have questions, please reach out to our support team for assistance.
Contact Support